


[ad_1]
If you’ve ever seen an artistic photo of a waterfall or river, you’ve seen a creative long-exposure shot where the water is intentionally blurred, but the surrounding rocks and trees remain sharp. It may happen. This is a great technique to give the impression of movement to still images, but it used to require a DSLR camera with a filter and a tripod. But with the great features built into your iPhone’s camera, you can take just as good-looking photos. You don’t need the latest iPhone 15 Pro or Pro Max to take advantage of this feature. Works with all iPhones released after iPhone 6.
read more: Take the best photos ever with iPhone
This technology uses Live Photos, a feature that turns still images into short animations by recording several seconds of video when you press the shutter. By analyzing which objects are moving, iPhone captures and blurs motion. It also recognizes things that aren’t moving (like rocks or walls) and tries to bring those objects into sharp focus. This allows you to take long exposure images even in bright midday sun without using a tripod or filters. Dear digital SLR cameras.
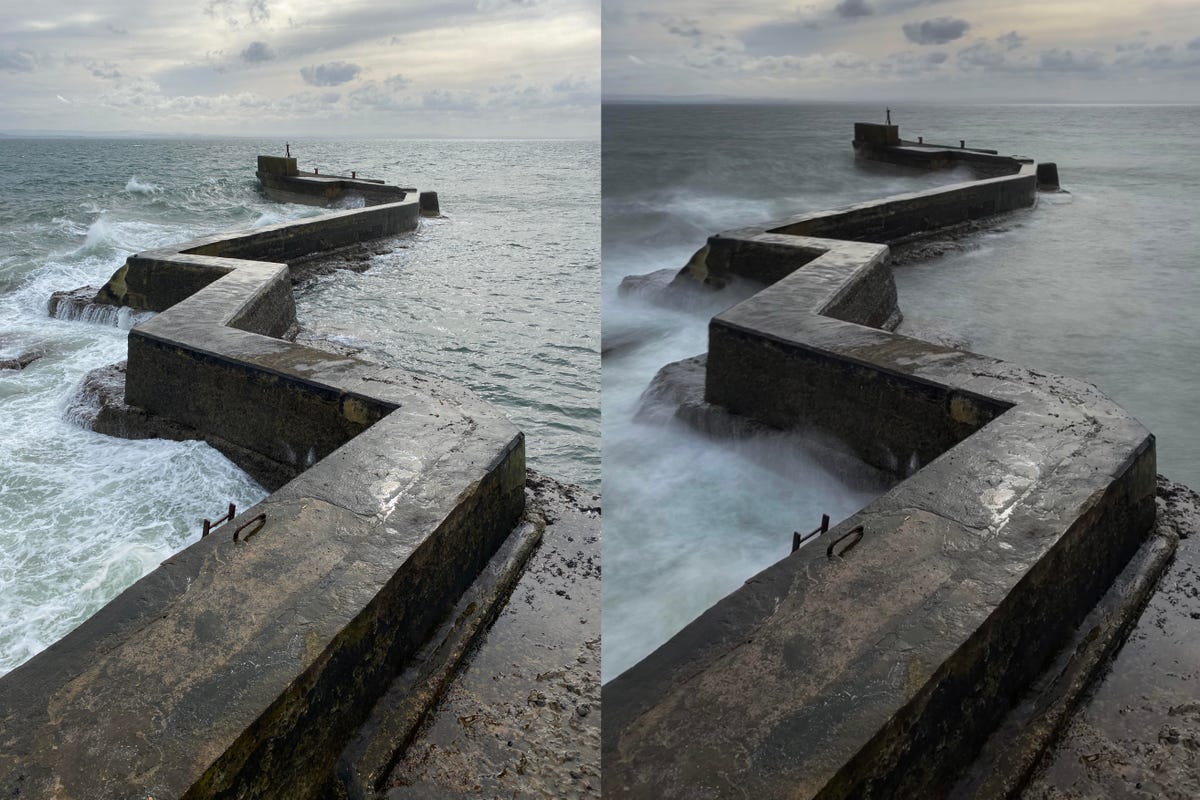
Standard image taken with iPhone 11 Pro (left) and the same image with long exposure mode enabled (right).
Here’s how:
Learn the secret to great long exposure shots
Not everything works as a long exposure image. A close-up of a flower waving in the wind will just look blurry and messy, but a photo of a parked car will remain, well, still.
What you need is a scene with both static and moving elements. Waterfalls are common subjects because while the surrounding rocks are solid, the flowing water is blurry. In fact, any body of water is suitable for experimentation.
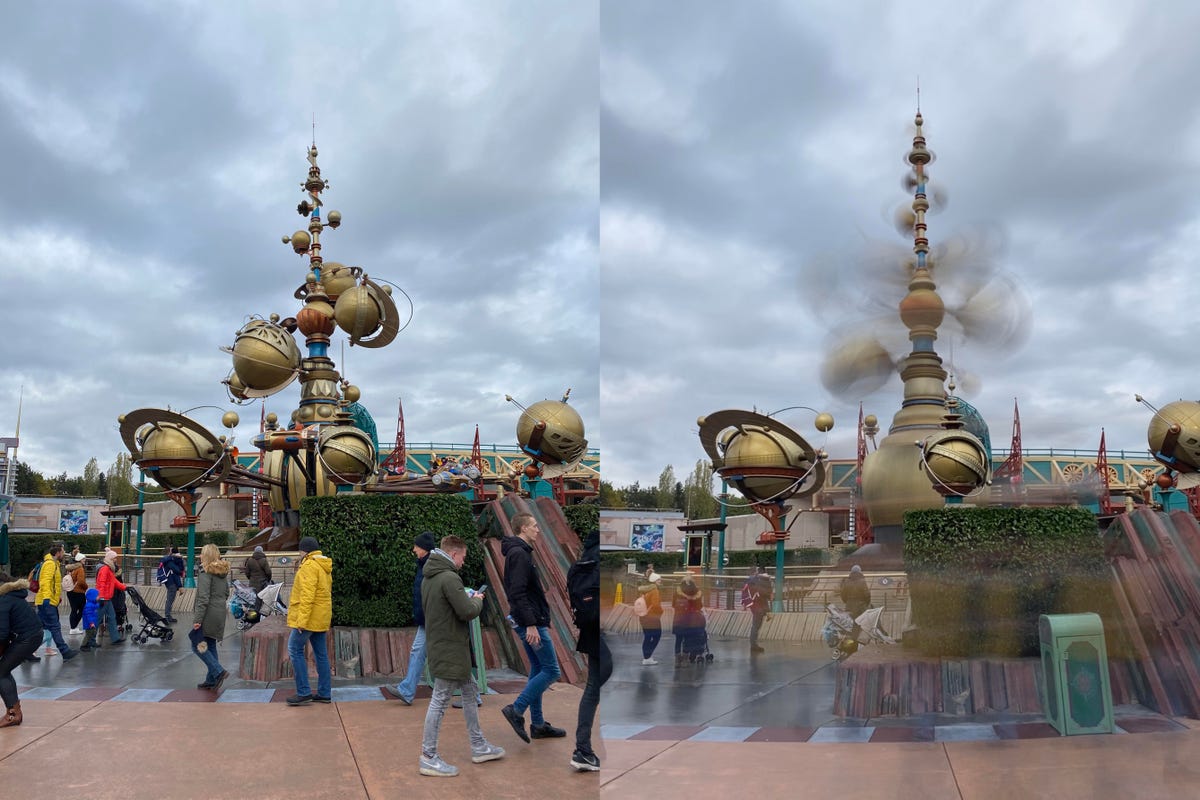
The standard shot (left) looks like an old photo from a Disney park. However, a long exposure (right) transforms the image into a dreamlike image that emphasizes the movement in the scene.
You can also try the crowded city streets. The long exposure effect keeps the buildings and roads sharp and fixed in the image, but the people walking around them blur into ghostly figures, looking atmospheric and dramatic.
Turn on Live Photos
To capture long exposure images, Live Photo requires movement to be recorded, so it’s important to enable that mode when shooting. This is located at the top right (if you’re holding it in portrait mode) or top left (if you’re holding it in landscape mode) of your camera’s screen. You will see an icon with two circles surrounded by a third dotted circle. If there is no line, Live Photos is enabled. If there is a line, tap the icon and the message “Live” will appear in a small yellow box on the screen.
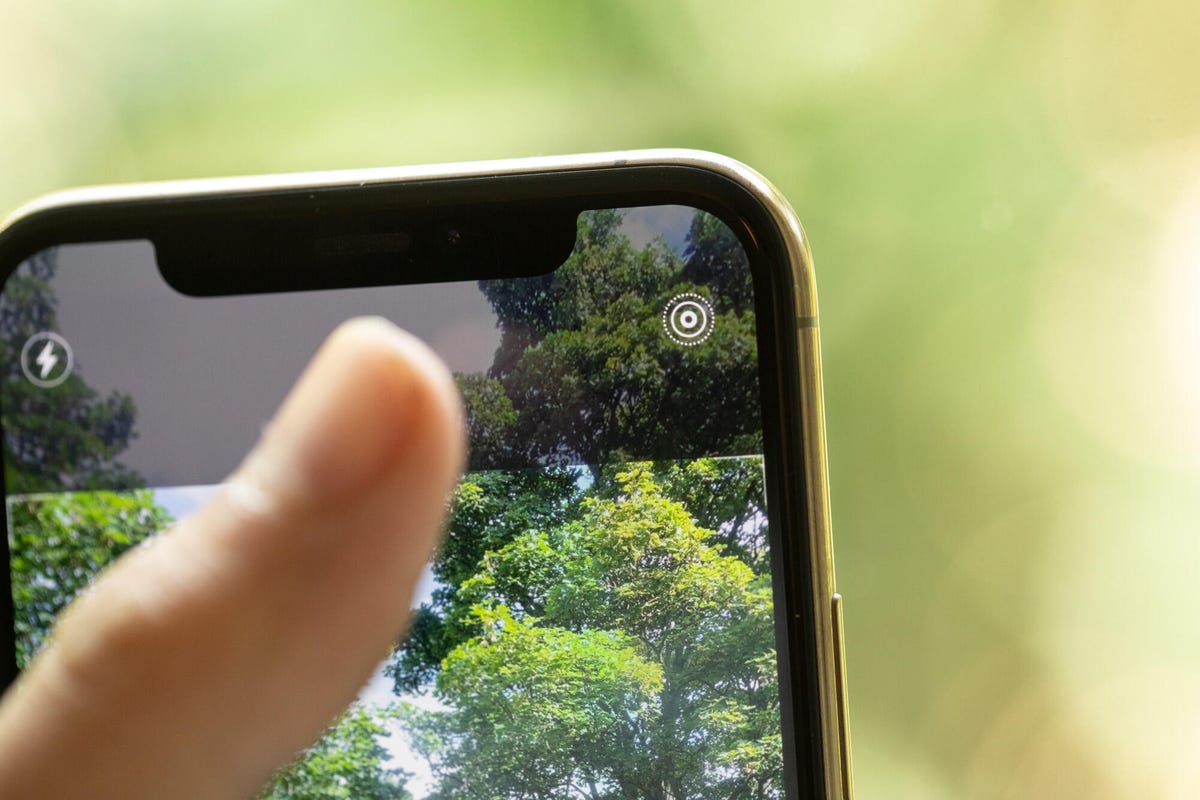
Make sure there is no line through this icon.
Please be stable
Although you don’t need a tripod to get good long exposure images with your iPhone, you’ll get the best results if you keep your phone as steady as possible while taking live images. We recommend placing your phone on a wall or other fixed surface while shooting. If you have to hold your phone in your hand, I’ve found that tucking your elbows in toward your body and holding your breath can help reduce motion blur while shooting.
It’s also a good idea to hold down the shutter button and take multiple shots. This increases your chances of capturing at least one image that is stable enough to produce an attractive long exposure.
Create a long exposure
Once you capture a live image, convert it into a real long exposure. First, open your image in the Gallery app. A small icon will appear in the top left. live It has a small downward arrow next to it. Tap the arrow to see options to turn the image into a looping GIF, a bounce GIF that plays forward and then backwards, or a long exposure at the bottom.
It takes a second or two, but you’ll quickly notice how the movement in the shot is blurred to create the dream-like effect you’re looking for. You can then zoom in and make sure it’s still good and sharp. Feel free to apply the same effect to other photos taken of the same scene in case you get better results.
If you’re still using iOS 14 or earlier, open the selected image in your gallery and swipe up. This will display a panel called . effect You can loop the motion in your video into a GIF. However, when you swipe to the end of the effects panel, the next effects panel appears. long exposure. Tap on it. However, you will need to update your phone to a newer version.
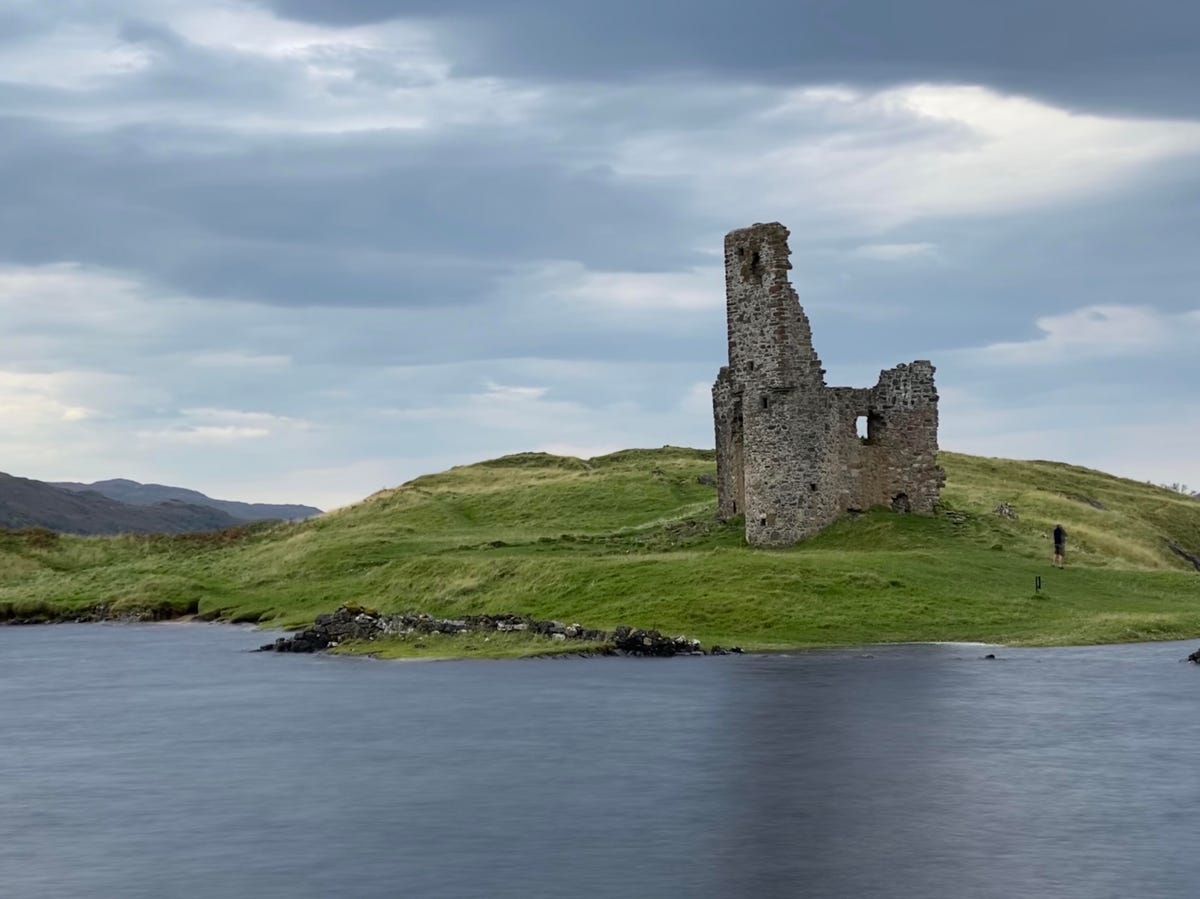
I didn’t intend to do a long exposure when I first took this shot, but since it was a Live photo, I was able to go back and turn on long exposure mode later.
check the library
Before you jump out to find your nearest waterfall, check out our library to see if you already have an image that works. The great thing about using the iPhone’s long exposure tools is that you don’t have to use them while shooting. You can go back and apply it to live images you have taken so far.
Perhaps you visited Niagara Falls in New York or Havasu Falls in Arizona a few years ago and happened to have Live Photos enabled when taking photos. You can enable long exposure for any shot by swiping up. You can also visit the Live Photos album in Gallery to see all the shots you have on your phone that can be turned into long exposures. My advice? Listen to a good podcast, sit in a comfy chair, and see what dreamy shots you can find in your library.
[ad_2]
Source link