


[ad_1]
Anyone can take iPhone photos, but not everyone knows how to get the most out of their iPhone camera without becoming a “professional photographer.”
How many times have you handed your iPhone to someone hoping they’ll take a photo of you for Instagram? In the end, you ended up with a crooked photo because the person hates you.
OK, maybe photographers don’t hate you, but you’ll absolutely love some of the iPhone camera tips I’ve collected here. They should help you:
- take straight photos
- Take more attractive selfies
- Avoid distractions when taking photos
- Get more dramatic photos every time (no editing required)
The best part? Setting up (or learning) these features literally takes seconds. Once you start using it, you’ll never look back. These are more than just tips and tricks I chose to put this article together (What is ChatGPT?!). I use everything on an iPhone 13 mini and an iPhone 15 Pro Max that I have for testing.
Let’s make you a better iPhone photographer…
10 “secret” iPhone camera tricks and settings that take seconds to set up and will forever change the way you take photos with your iPhone
Unlike humans, human photos have only one orientation. It’s straight. Using a spirit level with iPhone cameras should be a constitutional amendment.
Turn on “Horizontal” on your iPhone camera and you’ll never take crooked photos again
First on my list of extremely useful iPhone camera settings is the “Levels” feature. Settings > Camera > Levels. As I mentioned at the beginning, it seems like literally everyone takes crooked photos and it often ruins the moment you’re trying to capture. The solution is not rocket science…
The iPhone’s “Levels” feature is a white line that appears in the center of your camera’s viewfinder and turns yellow when you take a photo at a perfectly straight angle. What’s even better is that your iPhone vibrates when you compose your shot. His one tip for Apple would be to make this vibration stronger.
Mirrored iPhone selfies trick your brain into liking your selfies even more
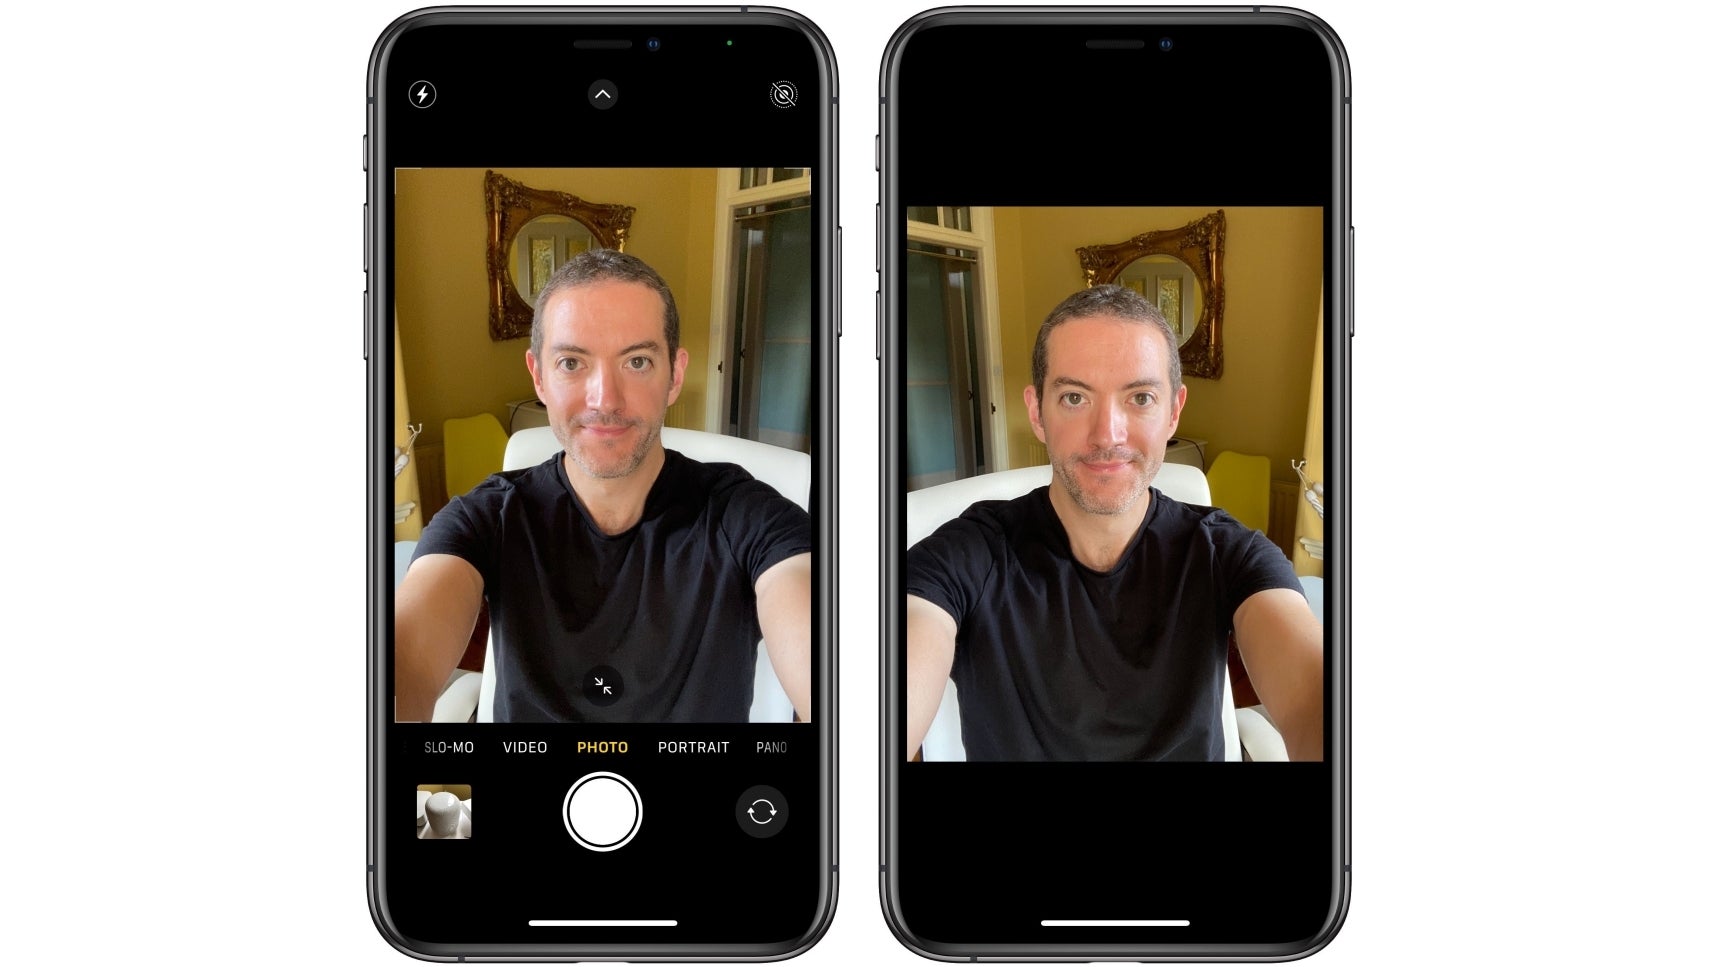
Selfies in the mirror look better because that’s what your brain thinks.
I’ll go here next time Settings > Camera > Front camera mirroring.
And the reason we want to do that is because humans are used to liking the way we see ourselves in the mirror, which is actually the opposite of how other people see us. This is why many people tend to find mirror selfies more attractive.
Almost everyone has used the photo editor on their iPhone at least once, flipping a selfie to see if it looks better. If you prefer “mirrored” selfies, you don’t have to do this every time. Or maybe you have this feature turned on but want to turn it off because you want your selfies to look more “authentic.”
Anyway, enough time to talk about vanity. Let’s move on…
The iPhone tries to distract you while taking photos. Here’s how to change it:
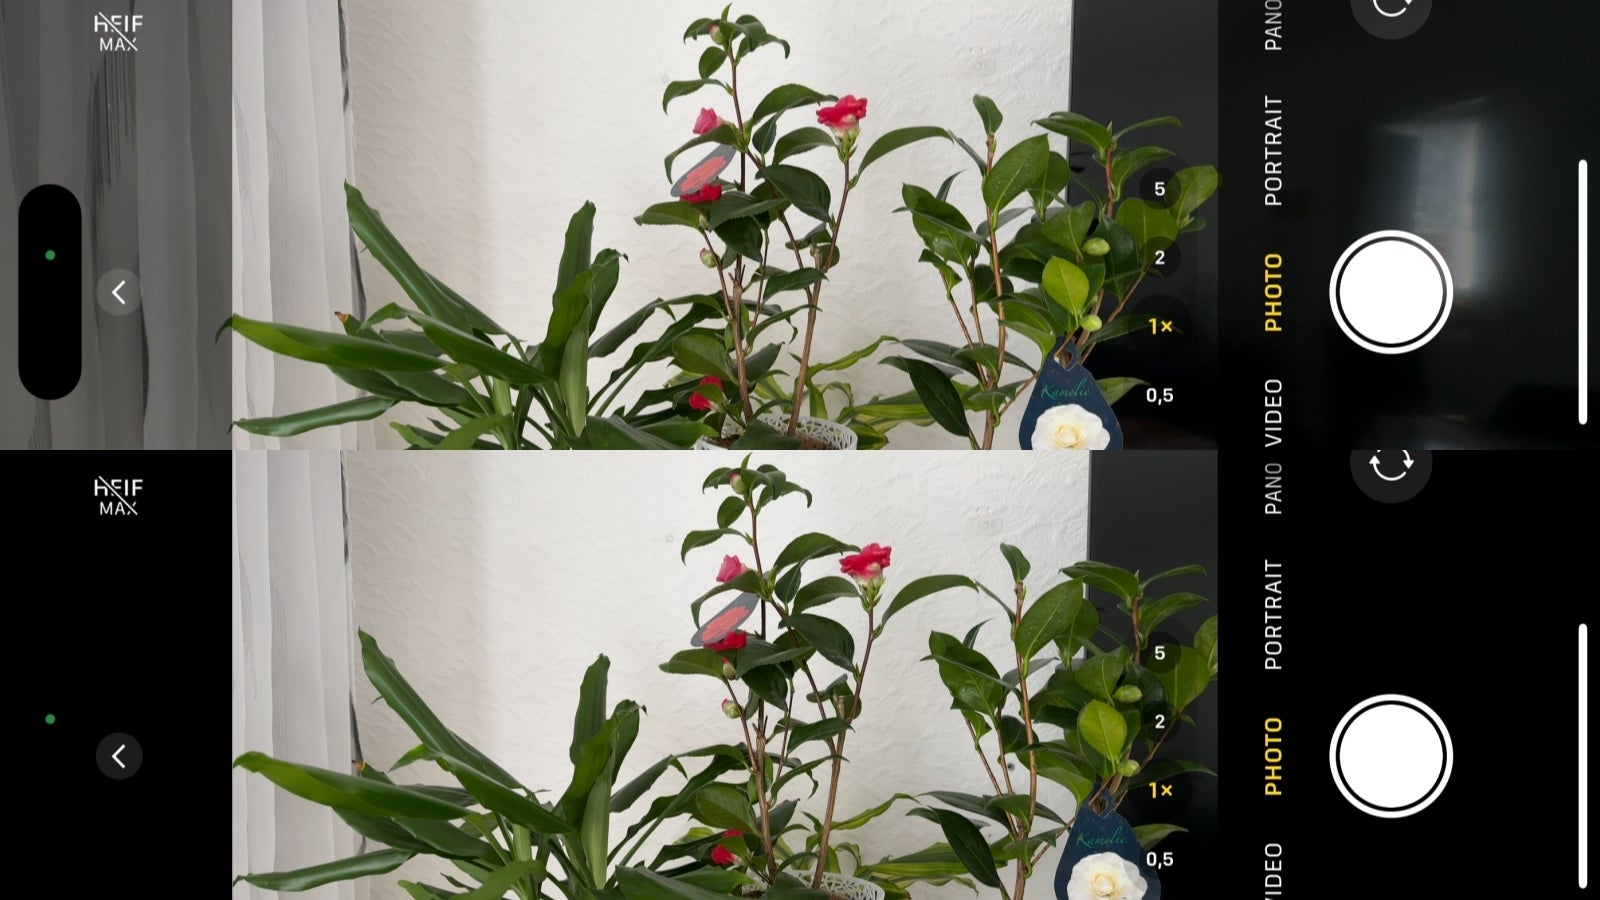
Show Outside the Frame is on (top) and Show Outside the Frame is off.
For this you need to go to: Settings > Camera > Show outside frame.
New iPhones ship with the Look Outside the Frame feature turned on. He has two reasons. For one, it has a zoom camera and an ultra-wide camera, and Apple wants to remind users that they can be used by showing a wider viewing frame. It’s essentially under the camera’s viewfinder. And two, I think it makes the experience of using the camera more immersive.
However, I quickly realized how distracting it can be when looking outside of the frame I’m trying to capture, especially for busy or moving shots. Needless to say, when you turn on this camera setting, you’ll see a dynamic island, so I don’t think anyone needs to see it.
Blacking out the left and right sides of the viewfinder makes photography easier and less distracting. I think this applies to most people.
Your iPhone may change the size of your face or the shape of your photo unless you change this setting.
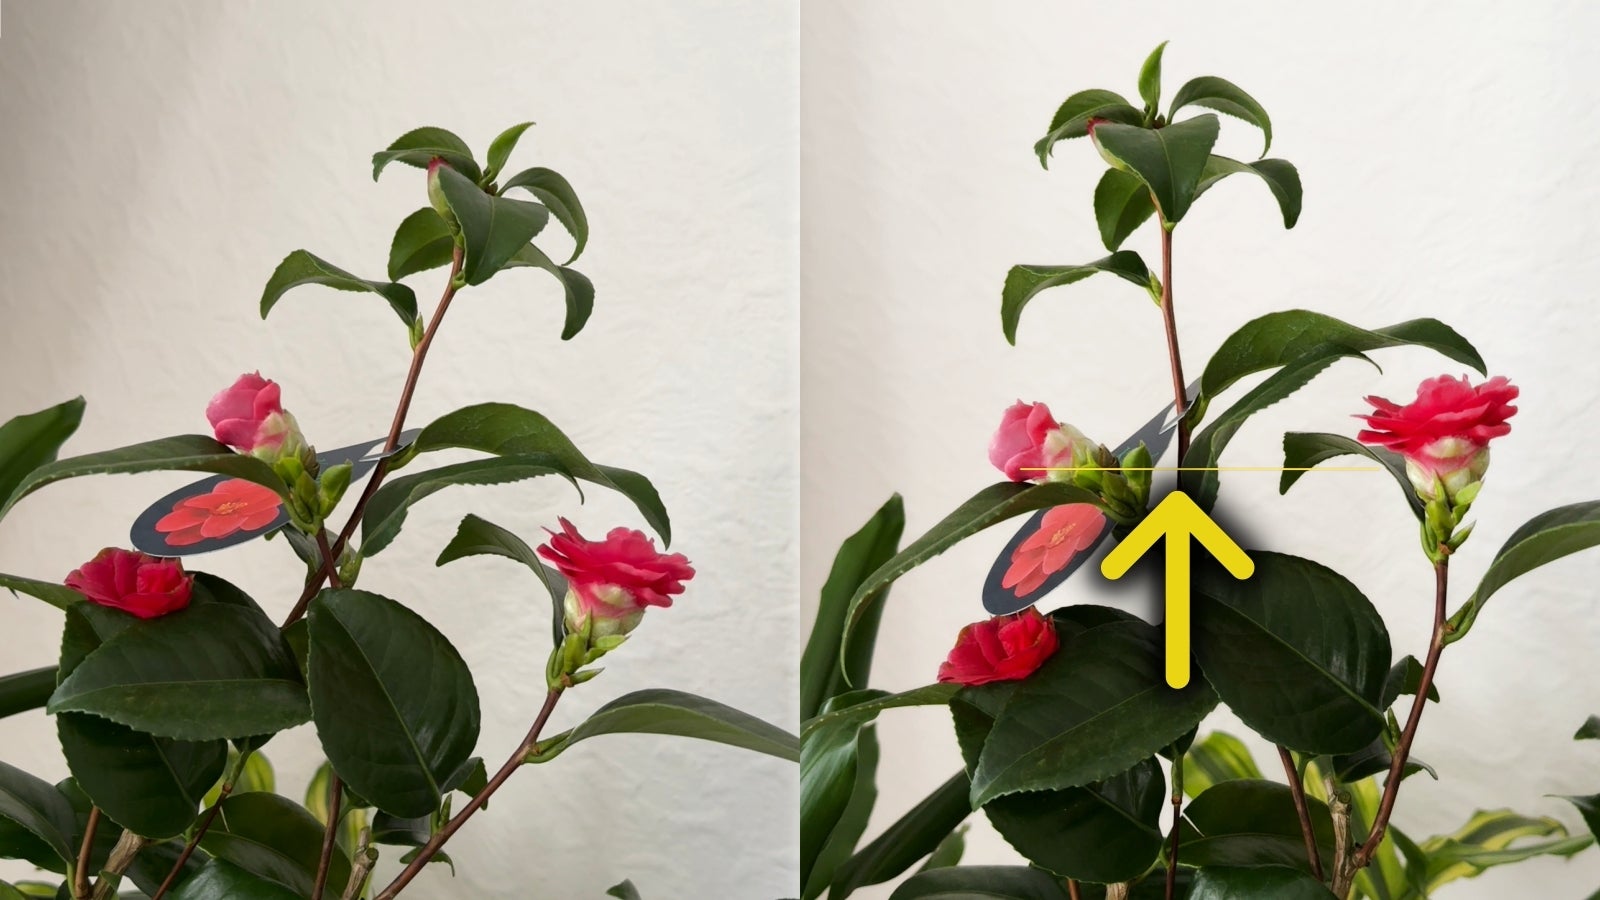
If I were you, I would immediately change the default focal length of my iPhone’s primary camera from 1x to 1.5x. Settings > Camera > Main Camera > Set default lens to 35mm (1.5x). Or you can switch back and forth between the two at any time in the camera app.
Hey, when you take a picture with me iPhone13 mini, because zooming in a little bit doesn’t require you to get too close to the subject and the photo looks more natural. This feature is iPhone15 The camera settings are amazing.
As you can see in the photo sample above, instead of using a 1x (24 mm) focal length and physically getting closer to your subject, stepping back and zooming to 35 mm (1.5x) will give you a more natural photo. Gained and focused. twist.
The second image (cropped from the first) shows how the lines on the floor and pot appear compared to the distorted look you get with the 24mm (1x) shot. The difference in perception is 100% real since I didn’t change the angle when taking (or cropping) the photo.
Shooting with 35mm (1.5x) instead of 24mm (1x) will generally give you more accurate photos, but it’s important when taking photos of people. It’s no coincidence that many professional cameras come with his 35mm lens by default. This focal length is close to what our eyes see, so a person’s face looks the way it should. So please leave 24mm in history.
iPhone cameras require the use of photo styles. These are more than just filters.
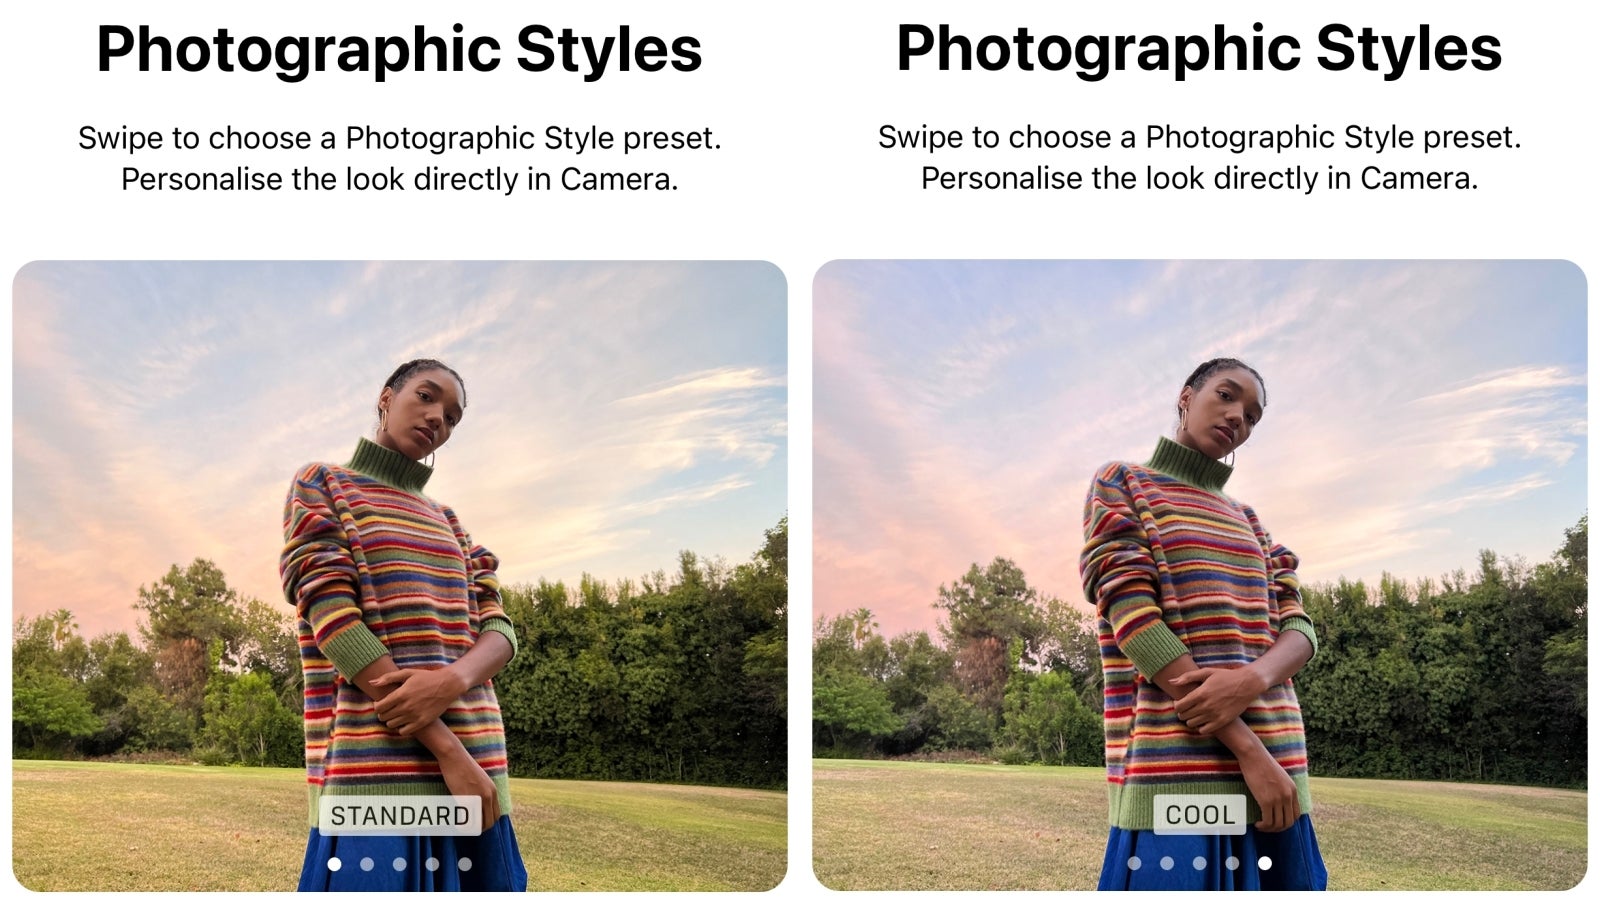
It’s not a filter!
Last but not least, the iPhone has another underrated feature that’s been around for a while – photo styles.
The main reason I find photography styles useful is because iPhones sometimes take photos with very little contrast, which causes shadows to pop and wash everything out. Using photo styles to add contrast not only because you don’t have to edit the photo, but also because this “edit” is baked into the actual image properties and not a filter (which is why it’s higher quality) .
Another thing many people don’t know about photography styles is that you can adjust them to your liking. For example, a rich contrast style doesn’t need to have very high contrast, and a warm style doesn’t need to have very warm colors. Drag the slider to adjust the style to get a “Rich Warm” style that is slightly more contrasty and warm than the standard iPhone style without going overboard.
Note that photo style settings are preserved. This is great if you like a certain style and want it to be on by default every time you start your camera. However, certain contrast and saturation levels won’t work for every shot, so you’ll need to double-check that you’ve got the right style for your photo. For example, increasing contrast can make night photos too dark.
Apple continues to refuse to give the iPhone a proper “pro mode,” but the iPhone’s camera is much more flexible than you think.
We’re sure you’re familiar with some of the tricks and features listed here, but we’re sure you’ll learn at least one new iPhone camera trick you didn’t know before. If so, I think so. My job is done.
Actually, I have at least 5 iPhone camera tips to share with you, but this article is already too long. So stay tuned for “Part 2” where you will definitely learn more “niche”. Here are some more useful iPhone camera techniques:
- How to (literally) edit all your photos/videos in one click – Yes, it’s possible.
- How to take more realistic photos/videos
- How to turn on night mode and take portrait mode photos and more…
[ad_2]
Source link